A Comprehensive Guide to Raised Bed Gardening

TEG Project Manager

Garden Addicted
Moderator
Joined
Jul 9, 2012
Messages
236
Reaction score
681
Points
206
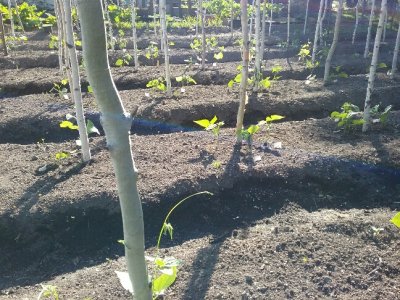
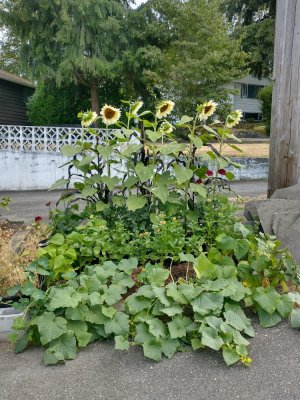
Raised bed gardening is a great way to grow your own food and flowers, even if you have limited space. This type of gardening allows you to control the soil, compost, and organic matter in your garden, making it ideal for growing a variety of plants, including vegetables, herbs, and flowers. The elevated beds help to reduce weeds and pests, and they also allow you to control the water and nutrients that your plants receive. With raised bed gardening, you can create a beautiful and productive garden that will provide you with fresh produce and beautiful flowers for years to come.

Raised Bed Gardening

Benefits of Raised Bed Gardening​

Increased Control​

One of the biggest benefits of raised bed gardening is that you have increased control over the growing conditions of your plants. You can control the soil, compost, and organic matter in your garden, which allows you to provide the perfect environment for your plants to thrive. This is particularly important for those who live in urban areas, where the soil quality may be poor, or for those who have limited outdoor space. With raised bed gardening, you can create a customized soil mix that is ideal for your plants, which will help them grow strong and healthy.

Reduced Weeds and Pests​

Another benefit of raised bed gardening is that it reduces weeds and pests. The elevated beds prevent weed seeds from germinating and make it easier to control the pests that can damage your plants. This means that you will spend less time and energy weeding and controlling pests, and you will have more time to enjoy your garden and harvest your crops.

Improved Drainage​

Raised bed gardening also improves drainage, which is important for plants that require well-drained soil. The elevated beds allow excess water to drain away from the roots, which helps to prevent root rot and other plant diseases. Additionally, raised beds can be designed with drainage in mind, which makes it easy to control the water that your plants receive.

Increased Accessibility​

Another benefit of raised bed gardening is that it increases accessibility. With elevated beds, you don't have to bend down to plant or harvest your crops, which makes it easier for those with physical limitations to gardening. This also makes it easier to maintain your garden, as you can easily reach all parts of the bed without having to kneel or bend down.

Raised Bed Gardening

How to Build a Raised Bed​

Building a raised bed is a simple project that can be done in just a few hours. Here's how to build a raised bed:
  1. Choose a Location: Select an area in your garden that receives at least six hours of sunlight a day and has good soil drainage.
  2. Determine the Size: Measure the area where you plan to build the raised bed, and determine the size of the bed you want to build. The most common sizes for raised beds are 4x4 feet, 4x8 feet, or 8x8 feet.
  3. Select the Material: Choose a material to build the raised bed, such as wood, stone, metal, or plastic. If you plan to grow food in the bed, make sure the material is safe for growing food and will not release any harmful chemicals into the soil.
  4. Prepare the Area: Clear the area where you will build the raised bed, removing any grass or weeds, and level the ground as necessary.
  5. Build the Frame: Cut the wood, metal, or plastic to the desired length for the sides of the raised bed. Assemble the frame by connecting the sides with screws, nails, or brackets.
  6. Add the Bottom: To improve drainage, add a layer of hardware cloth or landscape fabric to the bottom of the raised bed before filling it with soil.
  7. Fill with Soil: Fill the raised bed with a mixture of soil, compost, and other organic matter. Make sure to fill the bed with a soil mixture that is appropriate for the type of plants you plan to grow.
  8. Plant Your Crops: Once the raised bed is filled with soil, you can start planting your crops, herbs, or flowers. Make sure to plant them according to the recommended spacing and depth, and water them well.
Raised Bed Gardening

Tips for Successful Raised Bed Gardening​

Raised bed gardening can be a rewarding experience, but it's important to follow some tips to ensure your garden is successful. Here are some tips to help you get started:
  1. Choose the Right Soil: Use a quality, fertile soil mix specifically designed for raised bed gardening. This will ensure that your plants have the nutrients they need to grow healthy and strong.
  2. Plan Your Layout: Consider the size and location of each plant in the raised bed, and make sure to plant them in a way that allows for proper spacing and sunlight.
  3. Provide Adequate Drainage: Make sure your raised bed has adequate drainage to prevent water from pooling and causing root rot. You can add a layer of coarse sand or gravel to the bottom of the bed to improve drainage.
  4. Water Properly: Regular watering is important for the health of your plants, but it's also important not to overwater. Make sure to water deeply and less frequently, and allow the soil to dry out between waterings.
  5. Fertilize Regularly: Use a balanced fertilizer to provide your plants with the nutrients they need. You can also add compost or other organic matter to the soil to provide additional nutrients.
  6. Keep the Bed Weeded: Regularly remove weeds from the raised bed to prevent them from competing with your plants for nutrients and water.
  7. Pest Control: Use organic methods to control pests, such as companion planting, using insect-repelling plants, and hand-picking pests off your plants.
  8. Mulch the Bed: Adding a layer of mulch to the surface of the soil will help conserve moisture, control weeds, and regulate soil temperature.

That's it! With a little time and effort, you can have your own raised bed garden and enjoy the benefits of growing your own food and flowers. By following these tips, you can create a thriving raised bed garden that will provide you with fresh produce and beautiful flowers for years to come.

Share your thoughts & experiences regarding raised bed gardening in the comments section below.
 

baymule

Garden Master
Joined
Mar 20, 2011
Messages
18,327
Reaction score
34,456
Points
457
Location
Trinity County Texas
THIS! My garden will be in tubs this year, but raised beds are in the plans. I’ll still have a regular garden for certain crops, but majority will be raised beds, for all the reasons listed above. Especially not bending over!
 

flowerbug

Garden Master
Joined
Oct 15, 2017
Messages
15,878
Reaction score
23,771
Points
417
Location
mid-Michigan, USoA
...
Share your thoughts & experiences regarding raised bed gardening in the comments section below.

they have their uses but for a large garden space it is too expensive and they are a lot more work. there is less flexibility in rotational growing, fixed pathways are a waste of space. i do have some raised areas for planting due to flash flooding but in the end if i could do away with those i would because they are more work. it is very easy for me to keep up larger gardens with fewer pathways and fewer edges.

every edge is work. for raised beds they're not also more work but they are much more expensive.

for those who do need better drainage but cannot afford formal enclosed raised beds) you can adapt to using raised areas in a more informal way (pile up your garden soil and then tamp the side with your foot or a flat shovel or board or something and then mulch it). that will work for a season. then next season you can restore it by piling a little more garden soil on there and then repeating. works well enough, very inexpensive, very simple.
 

ducks4you

Garden Master
Joined
Sep 4, 2009
Messages
11,150
Reaction score
13,823
Points
417
Location
East Central IL, Was Zone 6, Now...maybe Zone 5
EVERYTHING I plant in is a form of raised bed. I have hit Lowe's over the years bc they have a cutting service in the back of their stores and many people buy a whole piece of wood, but leave what they don't want at the back of the store. They sell those pieces cheap, although the price has gone up.
Non treated wood lasts ~5 years. I keep mine a little longer than that, and burn them only when they can't be used at all anymore.
Technically, a "raised bed" is any planting area that has soil raised up even a few inches, and the gardener does not walk on it and compress the soil.
Over the last 23 years I got tired of using a string trimmer. It is the biggest garden time waster. 5 minutes it works, the next 55 minutes you spend restringing it.
So, I have gathered wood for vegetable/flower beds, and gotten free bricks and used existing stone pieces and bought pavers and created planting beds everywhere there was grass to be mowed next to any of my 5 buildings on my property, with the exception of the barn,
Look, all of us have been gardening for years now. It's no fun when your wallet cringes bc you keep buying all of the stuff to grow and growing becomes more expensive than buying at the store.
If you go shopping for raised bed kits, you are:
1) out about $100.00 before you get it home, with the cheapest kit and purchased soil
2) limited what you can grow
I met a lady at Rural King who was shopping their garden center. She told me that she knew little about gardening, but wanted to grow stuff, UNLIKE her Master Gardener MIL, who spends $1K's every season to feed her hobby.
I have been researching raised beds every since I joined your forums in 2009.
Glad you posted this. Just sayin' do your research and use what you already have. first.
Thought you all would enjoy this video, Check out the raised beds being used to grow in plots in NYC.
 

Branching Out

Deeply Rooted
Joined
Dec 2, 2022
Messages
1,371
Reaction score
4,388
Points
175
Location
Southwestern B.C.
Flowerbug, I would be interested to learn more about your strategies for reducing pathways in large garden spaces-- in particular, in the absence of pathways how do you move about without compacting the soil?

We have soggy soil here for half of the year, and I find that informal raised beds work well in our garden--especially during the rainy seasons. Last fall I planted a 20' row with garlic in a 8" high bed, and it LOVES the excellent drainage that these raised surfaces provide. However, during the summer those same raised growing spaces are so very difficult to keep irrigated. I am considering adding extra mulch around the perimeter come July, to create a trough effect to prevent the water from just running off once the surface of the soil becomes dry during the arid months of summer. I am also considering planting beans or low-growing flowers like calendula around the perimeter, to shade the sides and capture the run-off water.

We also have a couple of 8' x 4' x 10" cedar frames under construction (well, the boards have been cut and ready for two years-- just haven't gotten around to fastening the sides together yet...you can't rush these things...) Thankfully we purchased the wood before the price of lumber soared. I am kind of wanting to convert some lawn to more garden beds, by using these frames as kind of a temporary template to create the footprint of the new growing space. I am thinking that once the lawn underneath is good and dead we could lift off the frame, and place it in a new spot. Not sure if this would work, but could be worth a try.

And last year I made a little raised bed in a scrubby patch that runs between ours and the neighbours driveway. The ground has quite a slope, so I held the soil up with a couple of old cedar beams along the top and bottom, and I was able to re-purpose two long, deep, narrow cardboard delivery boxes for the sides. I cut three openings in the tops of each box, filled them with soil, and then planted seedlings in them. Once the foliage filled in you could hardly see the cardboard boxes. It worked quite nicely except that the cucumber plants kept growing towards the driveway, so my husband kept driving over them. 🙃
 

Attachments

  • IMG_20220827_091459175_HDR.jpg
    IMG_20220827_091459175_HDR.jpg
    283.7 KB · Views: 80

ducks4you

Garden Master
Joined
Sep 4, 2009
Messages
11,150
Reaction score
13,823
Points
417
Location
East Central IL, Was Zone 6, Now...maybe Zone 5
I have only one raised bed that I assembled with hardware, see picture below. Since then I stopped using hardware to assemble my raised beds.
Garden bed, 3' x 6', 2nd amendment, 01-21-23.jpg
Now I pound stakes on each side of each raised bed wall to keep them horizontal.
Previous owners left short pieces of rebar and they are my favorite to work with. I also replaced the 10 ft walkway to the garage door that used to have landscape timbers held my rebar with cinder blocks and that gave me more rebar. Haven't ever bought rebar, but I may need to.
I use garden stakes, and I buy the cheapest I can find. Here is my favorite for constructing a raised bed.
This also allows you to move your beds as you rotate your crops. You will be less inclined to unscrew the corners and move a bed in the future. I know that my 3' x 6' bed, that I created with corner brackets still sits where I put it some 10 years ago. I am planning on planting leeks there this year.
You can plainly see where I have had to shore it up.
If your soil is a little bit compacted you can use your shovel and dig a small hole to pound the stake in, then backfill. By midsummer it will have naturally compacted in, Even though nobody but me sees my beds I prefer to pound the stakes level with the wooden walls of my planting beds.
One more thing...not everybody here has a truck with a full 8 ft bed, like me, so it's difficult to get long wooden pieces home. Go shorter, and use the stakes to hold it up. Find pieces of 1/4" plywood, cut them into small pieces and put those pieces on the inside of your bed where the shorter 2 x 4's or 2 x 6's or 2 x 8's meet.
UNLESS you are building in the front yard and your HOA approves of this, it doesn't have to be pretty to work for you.
 

flowerbug

Garden Master
Joined
Oct 15, 2017
Messages
15,878
Reaction score
23,771
Points
417
Location
mid-Michigan, USoA
Flowerbug, I would be interested to learn more about your strategies for reducing pathways in large garden spaces-- in particular, in the absence of pathways how do you move about without compacting the soil?

i use the space between rows as my pathways. the soil here is mostly clay in many gardens, compaction is normal which isn't good, but when it is dry enough me walking on it barely makes any difference at all. every season i plant gardens differently so i'm not always using the same areas to walk on.

also i don't till or dig most gardens each season so in the rows i am planting i will loosen it up with a big fork or use the shovel to go down a ways just to give the roots a chance to grow (for the beans and peas). most of the rest of the things i plant (tomatoes , onions and peppers) i'm digging out a trench or holes to put some worms and worm compost in so that loosens up that soil for the season so the plants can get growing well enough.

i have to have raised areas or the gardens will be too wet too long. i irrigate by using the hose. the gardens do much better with regular rains but sometimes you can't count on rains so it is well water.

garlic i don't mind if it gets drier once harvest time is coming around. it's easier to harvest it from sandier soil for sure. not too many gardens here are like that.

i hope you have a nice harvest of garlic this season. :)


We have soggy soil here for half of the year, and I find that informal raised beds work well in our garden--especially during the rainy seasons. Last fall I planted a 20' row with garlic in a 8" high bed, and it LOVES the excellent drainage that these raised surfaces provide. However, during the summer those same raised growing spaces are so very difficult to keep irrigated. I am considering adding extra mulch around the perimeter come July, to create a trough effect to prevent the water from just running off once the surface of the soil becomes dry during the arid months of summer. I am also considering planting beans or low-growing flowers like calendula around the perimeter, to shade the sides and capture the run-off water.

usually garlic is down deep enough that some surface drying out is ok. i just give it regular water with the hose when needed. about once a week.


And last year I made a little raised bed in a scrubby patch that runs between ours and the neighbours driveway. The ground has quite a slope, so I held the soil up with a couple of old cedar beams along the top and bottom, and I was able to re-purpose two long, deep, narrow cardboard delivery boxes for the sides. I cut three openings in the tops of each box, filled them with soil, and then planted seedlings in them. Once the foliage filled in you could hardly see the cardboard boxes. It worked quite nicely except that the cucumber plants kept growing towards the driveway, so my husband kept driving over them. 🙃

haha! yeah, i've had some melon and squash plants that wandered far from where they were started. in the fenced gardens out back i don't mind them wandering off into the pathways at least then they are using what is dead space to me. all the rocks and gravel still have to be taken care of and weeded at times so by the time i've done that i keep thinking to myself that i'd rather it was just all one big garden. many years ago we had a lot of small gardens with a lot of pathways around them but i've consolidated quite a few and will continue to do that as i get the time if other projects don't get in the way.

the best pathways i like are those i can do with wood chips, underneath is some weed barrier and if there is a question of grass or weeds coming up through any of it i'll also put down a few layers of overlapping cardboard (under the weed barrier). wood chips aren't too expensive here and they eventually break down into humus that can be used in a garden. that's useful and ok with me.

by contrast what we have here in many garden paths is crushed rinsed limestone and it's been there a long enough time that there is dirt down there and weeds will get growing. so to lift all that gravel and to clean it out and then put it back down is a lot of work.
 

heirloomgal

Garden Addicted
Joined
Jan 17, 2021
Messages
3,609
Reaction score
11,606
Points
235
Location
Northern Ontario, Canada
I am considering adding extra mulch around the perimeter come July, to create a trough effect to prevent the water from just running off once the surface of the soil becomes dry during the arid months of summer.
This is actually a great idea! You'll be able to see if the water is running through. I have almost all raised beds, both with formal wooden sides and also just raised up, and a few rows terraced by necessity. I know exactly the issue you describe with run off. Little micro ways of dealing with that work pretty good.

If you have tomatoes on you raised beds, you can sink a medium sized flower pot beside it, or on both - even 4 - sides. Soil falling in and being a problem has never happened to me yet. You water the empty flower pot and the water drains straight into the underground.

I also find if you keep adding more and more compost the sponge action of the soil increases, though once you get to a certain level of surface dry it can still run. In the bean row below, once the plants got bigger I dug (hoed) a trench down the middle, leaving the ends still intact and watered the trench. I put the beans right on the edge for the added warmth, and height from the ground path for the pods to dangle a bit higher and not get all dirty. I use a level, everyone laughs, but it works! I have a garden that would have real bad run off problems if I didn't.
20210609_191258_resized.jpg


For the pole beans, you can't see it real good here as time works away at it, but I take my hand and run a circle around the beans around each pole so there is a watering indentation. This is especially helpful here because the poles are spaced so far apart and there really is no need to water the entire bed every time. So I have little circular trenches around each. They need to be re-trenched as the soil washes in but it only takes a few seconds each. Last summer I had to water with a watering can, so the trenches REALLY helped. It also is very helpful in keeping weeds down. I once met a gardener who told me she gardens in 'holes'. In a rainy summer of course this could be a recipe for disaster, but it isn't hard to pull a trench out with hoe, or just fill the dirt back in around the poles.
20220603_180610_resized-jpg.54917


I find the edge of the bed slope matters too. The ones above are steep (I was in a hurry last year so did not put as fine a point of the beds as I normally would have) but the soil is many feet deep there and can hold the water far down for a long while. The upper beds are not so deep so I slope them more gently.
20210614_162438_resized.jpg
I find
20210611_173119_resized.jpg
 

Attachments

  • 20220603_180610_resized.jpg
    20220603_180610_resized.jpg
    228 KB · Views: 150
Last edited:

ducks4you

Garden Master
Joined
Sep 4, 2009
Messages
11,150
Reaction score
13,823
Points
417
Location
East Central IL, Was Zone 6, Now...maybe Zone 5
I also find if you keep adding more and more compost the sponge action of the soil increases...
View attachment 54915
For the pole beans, you can't see it real good here as time works away at it, but I take my hand and run a circle around the beans around each pole so there is a watering indentation.
20220603_180610_resized-jpg.54917


I find the edge of the bed slope matters too.
View attachment 54919I find
GREAT suggestions, here!
I was struck by the visuals--your beds remind me of soil blocks.
i Really like your ideas for water retention, too.
Where do you get your poles? Do you prune and save them up?
 

Latest posts

Top