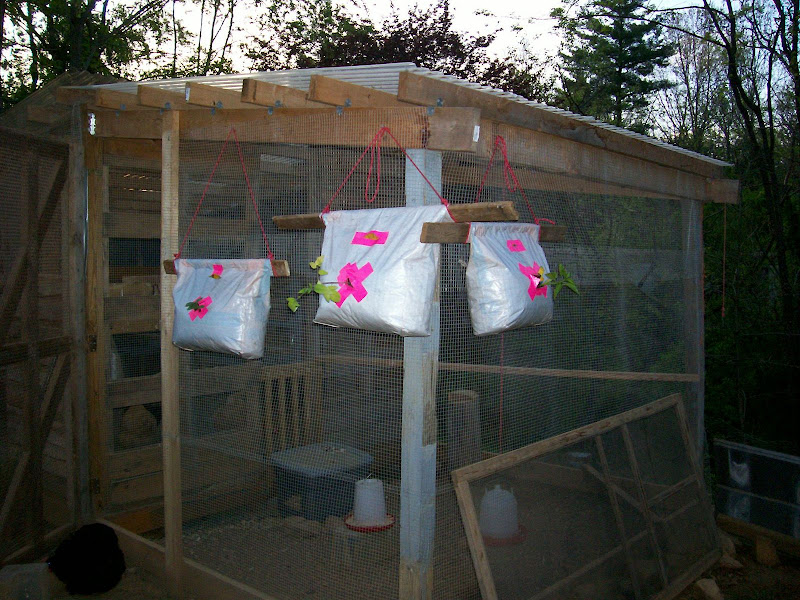
Ok.. I did it! I made the first just after my post, and I waited until my friend came over for the weekend to finish the other two, we each did one. She is now going home to make her own!
We used Pedigree 40lb dog food bags (BOSS seeds also come in the right bag), duct tape, a couple feet of strong rope, a 3 foot or so piece of flat wood, a utility knife & a stapler with minimum 1/2" staples.
I now have 3 of them hanging in front of the Black Orpington pen, check it out: D:
I didn't have a camera to take pics of the process, so I'll just describe it as it's quite straightforward.
1. Turn 40lb feed bag (woven type) inside out, take care to tuck the corners in nicely
2. Fill with soil. These each hold just less than 1.5 cu feet of dirt (approximately 40ish pounds worth) and shake the bag to tamp down the soild making sure to fill those corners.
3. Straighten up the bag, line it up and then staple it to a FLAT board just longer than the bag is wide. Then fold the bag down, one board width at a time, stapling as you go. Fold/wind down and staple, lifting the bag each time, letting the air out slowly and continue all the way down till you hit the dirt.
4. Lifting by the wood, allow the dirt to settle again, shake it a little here and there (it should look like the pictures now). There will be some air space above the dirt, and that's good. Secure with extra staples if need be.
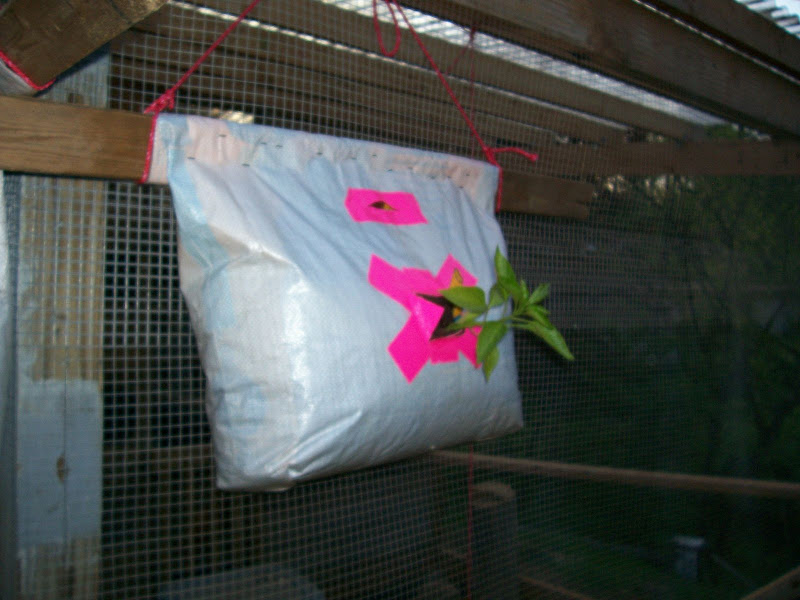
5. I placed an "X" of duct tape over the intended hole. And a strip directly above the X in the air space.
6. I used Peat Pots & Jiffy Pots (are they the same thing?) to plant the plants in and the edge of the pot is portruding from the hole. To insert the plant, I tilted the bag back just a little bit (resting on the ground) and used a utility knife to cut an X into the X of duct tape. The bottom triangle piece of the flap I cut again down the middle to make sure it doesn't dig into the stem, and reached inside and moved the dirt out of the way, inserted the plant, folded the peat pot in to the stem a bit, and then I put my hands over the pot and turned the bag upright again allowing all the dirt to pack around the pot. Using the airspace to push the dirt in the bag around until it was packed firmly. (lotsa words for a simple task)
7. Use the utility knife to cut a slit in the middle of the duct tape at the top of the bag (be sure not to cut the back panel too) and then use scissors to cut an "eyebrow" on the top part of the slit.
8. I used some heavy duty rope, tied it around the wood with several sturdy knots, and hung it!
Now I can use a watering can and insert that into the notch at the top of the bag to water as necessary or I can also spoon in some fertilizer or whatever as well.
I'm grown pickles, bell pepper & Brandywine tomatoes.
Zero cost, all scrap and I think they look nice too!
I may need to add drainage holes on the bottom, but I suspect the woven bag will seep well. If I add the holes, a couple inches of duct tape with a small slit in the middle of it along the bottom will be what I do.