Nice,
@Branching Out .

I understand some of the criticism of peat pots, re: root penetration & wicking. When I first started using them, I had a few problems with both (lost a few peas & squash due to wicking). But sometimes a problem turns out to be just a hurdle to be overcome, rather than a wall.
These are Jiffy 32's, which I use for all cucurbits and most beans & peas. If I clean out the drainage hole (which is often obstructed) and add extra holes in the bottom & sides using an ice pick, I have no problems with root penetration. And if I add a thin later of sand in the tray under the pots, it acts as a reservoir to maintain moisture in the pots. That sand also allows the emerging roots to grow without being air pruned; those extra roots - if handled carefully at time of transplant & not allowed to dry out - allow the transplants to "take" very quickly.
View attachment 53968 View attachment 53969
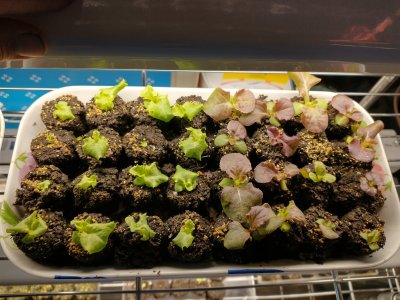
These are the Jiffy 32's (which I use for most beans) before & after. Note all of the plugged drain holes. I use the smaller Jiffy 50's to start okra & all Vigna beans & cowpeas, and 3" pots for the largest limas & runner beans. All of those get "ventilated" the same way. It takes maybe 2-3 hours to process all of the pots that I need for the year, while listening to music.
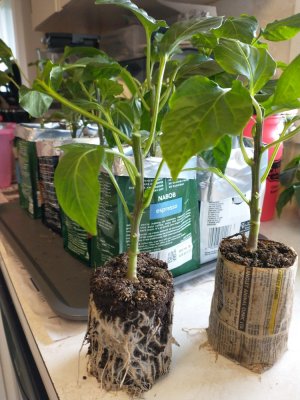
As others do, I tear off any excess pot above the soil line at the time of transplant, to reduce wicking. Two other tips:
- Packing the soil tightly into the pots (a glass spice bottle works nicely for that) will reduce the likelihood of the pot separating from the soil (and the root ball).
- Having a layer of sand in the tray, and nestling the pots into it, also helps to reduce the chances of mold or algae. The mold issue could perhaps be overcome by using a fungicide in the first soak (which might be helpful for paper pots & soil blocks as well) but as an organic gardener, I prefer other options.
IMO mold & algae are the biggest drawbacks of peat pots. Because of this, they are
poorly suited to anything which will be spending more than 2-4 weeks in the pot, such as tomatoes, peppers, onions, or slow-growing herbs. Those plants also tend to have less sensitive root systems, and do quite well in re-usable plastic containers.
I am very interested in hearing from gardeners who use paper pots or soil blocks, regarding their pros & cons. But personally, I have a lifetime supply of both peat & plastic, and have an "if it ain't broke..." philosophy.
")
Oh, and
friends don't let friends use peat pellets!. I wouldn't recommend those to my worst enemy (unless they really deserved it).

 An Amazon editorial review:
") .
.